(650) 332-8623
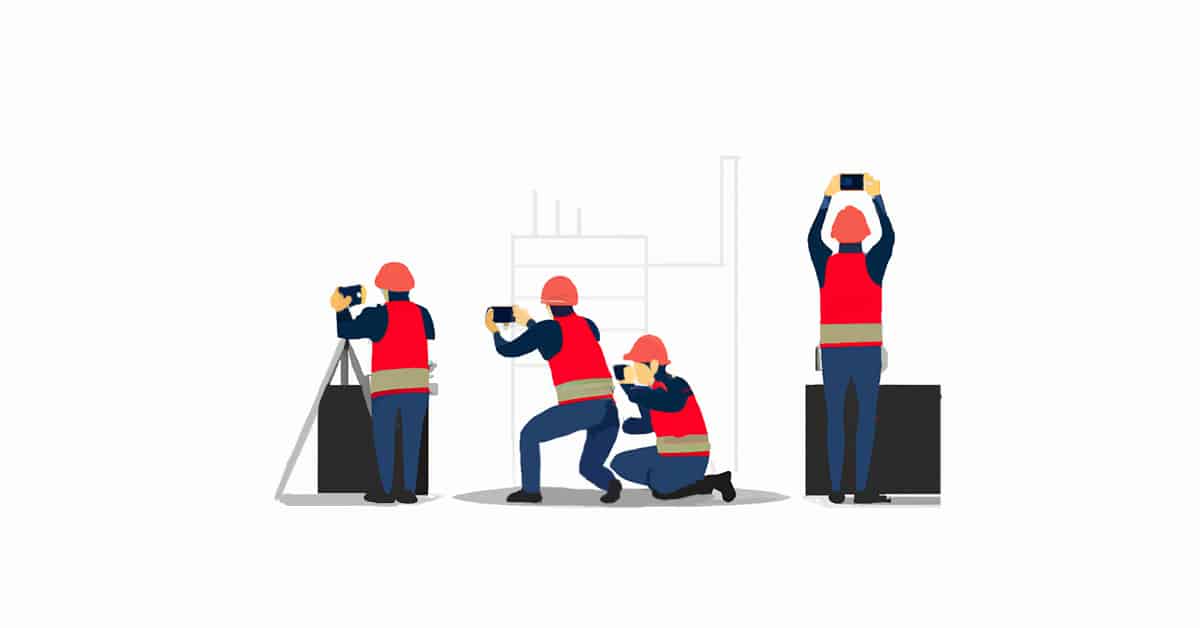
How to Take Progress Photos on Construction Sites
In this guide, we’ll explain how to take progress photos and why, plus compare common cameras for tracking progress on construction sites.

Progress photos aren’t just for fitness transformations. They’re also an important tool for construction professionals who need to document their work and track progress on job sites.
In the world of construction, progress photos serve as a visual record of the work that has been done and the work that still needs to be completed. They are used to document the status of a project, track progress, and support accurate construction documentation that protects teams from disputes and delays.
By understanding how to take progress photos in construction, professionals can make sure that they’re documenting their work accurately and in a way that helps them to stay on track and within budget.
This article will cover everything construction professionals need to know about taking progress photos. We’ll discuss the best practices for taking progress photos, and why they’re important.
In addition, we will provide an overview of the best cameras for taking progress photos. We’ll break down the pros and cons of each camera type and go over tips for each option.
By the end of this article, you will have a comprehensive understanding of how to take progress photos in construction and the tools you need to get the job done right.
How to take progress photos
If you’re running a construction or field service business, taking progress photos is an excellent way to keep track of your projects and make sure everything is on schedule.
Progress photos also support field data collection, helping teams capture real-time jobsite conditions, completed work, and potential issues as they happen. When paired with systems that help you monitor progress on a construction project, these photos become a reliable way to validate milestones and catch delays early.
But it’s not just about taking random photos here and there. To get the most out of your progress photos, there are a couple of best practices to keep in mind.
1. Set a schedule
First and foremost, it’s important to set a schedule.
You don’t want to miss any critical stages of the project, and you should have a comprehensive visual record of the progress made. Ideally, you should aim to take photos at regular intervals (i.e. once a week or once every two weeks), depending on the length and complexity of the project.
When scheduling progress photos, you should account for any major milestones or events that are likely to happen during the project.
For example: If you’re building a house, make a note to take extra photos during the framing and roofing stages, as these are crucial components of the construction process.
2. Choose consistent angles
By choosing consistent angles, you’ll be able to compare photos side by side and get a clear idea of the progress made. This will also make it easier to identify any issues or areas that need extra attention.
When choosing angles for your progress photos, consider the key components of the project.
For example, if you’re building a bridge, take photos from both sides of the river to capture different perspectives. Alternatively, if you’re constructing a high-rise building, you might want to take photos from the ground up to capture the height and scale of the project.
Bonus Tip: Think about the lighting conditions when taking progress photos. Aim to take photos at the same time of day to ensure consistent lighting and avoid any drastic shadows or glare that could impact the quality of the images.
3. Use a high-quality camera
While you might be tempted to rely on your smartphone camera, it’s generally not the best option for capturing high-quality images that accurately represent your project’s progress.
Instead, you should consider investing in a high-quality camera that’s specifically designed for construction photography.
Look for a camera that has a high resolution, wide-angle lens, and the ability to capture both photos and videos. With a good camera, you’ll be able to capture detailed images that accurately represent the progress made on your project. We’ll break down camera options in more detail a bit later.
4. Include relevant details
Make a note of all the relevant details that can help you understand what’s happening in each image. Include things like:
- The date
- The time
- The location of the photo
- Any other relevant information
By keeping records of everything, you’ll be able to quickly and easily identify when and where each image was taken, which can be helpful if you need to reference specific stages of the project in the future.
Additionally, including details like the weather conditions or any notable events that occurred on the day the photo was taken can help you better understand the context of the image.
To make it easier to keep track of these details, you should try using a dedicated project management tool that allows you to tag each photo with relevant information. This will make it easy to sort through your files and quickly find the ones you need.
5. Attach photos to tasks
To get the most out of your progress photos, attach them to specific tasks in your project management software or construction daily reports. This makes it easier to track completed work, spot issues faster, and keep everyone aligned.
By doing this, you’ll be able to easily track the progress made on each task and get a comprehensive overview of your project’s progress.
This is where you can include a brief description with the information that you gathered before. This will make it easier for team members to quickly understand what’s happening in each photo and identify any issues or areas that need extra attention. Many teams also include progress photos in field reports, giving office staff and clients clear visual proof of jobsite activity.
Ideally, your project management tool will allow team members to comment on photos and add their own notes. This can be helpful for collaboration and communication, as team members can share their insights and provide feedback on specific tasks.
6. Label and organize photos
To make it easy to find the photos you need, label and organize them appropriately. Creating a clear and consistent labeling system that allows you to quickly identify the content of each photo.
Remember that with your labeling system, you want to include relevant details like the date, time, location, and task.
You can use a layout like this to label your photos:
[Date]_[Location]_[Task]_[Angle].jpg
Ex: 2022-05-10_123-Main-Street_House-Framing_Rear-View.jpg
This label provides clear information on when the photo was taken, what task it’s associated with, and what angle the photo was taken from.
In addition to labeling, make sure to organize your photos in a logical and easy-to-navigate way. You can use folders or tags to group related photos together, and use consistent naming conventions throughout.
7. Archive photos for future reference
Taking progress photos isn’t just about tracking your project’s progress in real-time.
It’s also an essential part of creating a comprehensive record of the project that can be used for future reference. It’s crucial to archive your progress photos in a way that allows you to access them easily and quickly when you need them.
The most effective way to archive progress photos is to use a cloud-based storage solution that allows you to store and organize your files securely. With this method, your photos will be accessible from anywhere and won’t be lost if your device is lost or damaged.
Archiving your progress photos can be especially helpful if you need to refer back to them in the future for legal or marketing purposes. By having a comprehensive visual record of your project’s progress, you’ll be able to showcase your work and provide evidence of your team’s expertise.
Why take progress photos
Taking progress photos in construction is a crucial part of project management. In this section, we’ll explore some of the key reasons why you should be taking progress photos.
1. Documentation
One of the primary reasons to take progress photos is to create a comprehensive visual record of your project. This documentation can be used for a variety of purposes, including the following.
Providing evidence of work completed.
Progress photos can be used to prove that work has been completed as promised, which can be especially important for legal or financial reasons.
Recording changes and issues.
By taking regular progress photos, you’ll be able to identify any changes or issues that arise during the project. This can be helpful for identifying potential problems early and resolving them quickly.
These images are especially helpful when supporting change orders, since they provide time-stamped evidence when scope changes arise. They’re also valuable when dealing with formal construction change directives, where documentation must clearly support pricing or scope adjustments. Over time, this level of documentation strengthens overall construction change management and reduces disputes.
Tracking project progress.
Progress photos can be used to track the overall progress of your project, including major milestones and the completion of specific tasks.
2. Communication
Progress photos can also be used as a tool for communication. By sharing them with team members, clients, or other stakeholders, you’ll be able to provide a clear and visual representation of the project’s progress.
Keep stakeholders informed.
Progress photos can be used to keep clients or other stakeholders informed about the status of the project, which can help build trust and maintain good relationships.
Provide context.
Progress photos can be used to provide context for issues or challenges that arise during the project. By sharing photos, you’ll be able to provide visual evidence of what’s happening and explain any necessary actions.
Facilitate collaboration.
Progress photos can be used to facilitate collaboration and communication among team members. By sharing files, team members can discuss specific issues or make decisions based on a shared understanding of the project’s progress.
3. Quality control
By taking regular photos and reviewing them for potential issues, you’ll be able to ensure that your project is being completed to your high standards.
Identify defects.
Progress photos can be used to identify construction defects or issues that may not be immediately apparent during the build. By catching problems early, teams can resolve them before they become costly rework or delays. They’re also useful for updating as-built drawings, creating a clear visual record of what was completed and when.
Monitor compliance.
Progress photos can be used to monitor compliance with safety standards, building codes, and other regulations. This can help ensure that your project is completed to the necessary standards and avoids any potential legal or financial issues.
Improve performance.
By using progress photos to identify issues or areas for improvement, you’ll be able to continually improve your team’s performance and ensure that your projects are completed to the highest standards.
4. Progress tracking
One of the primary reasons to take progress photos is to track the progress of your project over time. By taking regular photos and comparing them, you’ll be able to identify areas where work is progressing more slowly or quickly than expected.
Identify delays.
By comparing progress photos, you’ll be able to quickly identify any areas where work is behind schedule. This can help you take action to get the project back on track.
Track progress against milestones.
Progress photos can be used to track progress against specific milestones or deadlines. This can help you ensure that your project is on track to meet its goals.
Measure performance.
By using progress photos to track progress, you’ll be able to measure the performance of your team and identify areas where they may need additional training or resources.
5. Marketing
In addition to project management, progress photos can also be used as a marketing tool. By showcasing your work and the progress you’ve made, you’ll be able to attract new clients and showcase your team’s expertise.
Showcase your work.
Progress photos can be used to showcase your team’s work and highlight the quality of your construction projects. This can be especially helpful for attracting new clients and building your reputation in the industry.
Provide social proof.
By sharing progress photos on social media or other marketing channels, you’ll be able to provide social proof of your team’s skills and expertise.
Differentiate yourself from competitors.
Progress photos can be used to differentiate your construction business from competitors and highlight your unique approach to project management.
6. Legal protection
Finally, progress photos can also be used as a tool for legal protection. By taking regular photos and archiving them appropriately, you’ll be able to provide evidence of the work that was completed and any issues that arose during the construction process.
Documentation: Evidence of completion and changes.
As outlined earlier, progress photos can be used as evidence to prove that work was completed as promised, which can be especially important in legal matters. By identifying changes or issues that arise during the project, you can pinpoint potential legal problems early and resolve them quickly.
Protect against liability.
The evidence that you gather with progress photos can protect you against liability in case of any legal disputes or claims.
7. Conflict resolution
One important reason to take progress photos is to help with conflict resolution. Construction projects often involve multiple stakeholders, including clients, contractors, and subcontractors. By archiving them appropriately, you’ll be able to provide evidence in case of any disputes or conflicts that arise during the project.
Resolve disputes.
Progress photos can be used to provide visual evidence of any issues or disputes that arise during the project. This can help you resolve conflicts quickly and efficiently.
Prevent disputes.
By taking regular progress photos, you’ll be able to identify potential issues early and take action to prevent disputes before they arise.
Provide transparency.
Progress photos can be used to provide transparency and clarity to all stakeholders involved in the project, which can help build trust and maintain good relationships.
8. Accurate billing
Another important reason to take progress photos is to ensure accurate billing for the project. By keeping a record to measure against specific tasks or milestones, you’ll be able to accurately bill clients or contractors for the work that has been completed.
Solid documentation for accurate billing.
Evidence of completed work will ensure that you’re billing accurately for the work done.
Tracking progress against tasks or milestones.
By taking regular progress photos and tracking progress against specific tasks or milestones, you’ll be able to accurately bill for the work completed.
Avoid disputes over billing.
By providing visual evidence of the work completed and tracking progress accurately, you’ll be able to avoid disputes or conflicts over billing that can be time-consuming and costly to resolve.
Capture photos and monitor progress with Workyard.
Try it now
Best cameras for taking progress photos
The type of camera you use can make a big difference in the quality of the progress photos you take. In this section, we’ll provide an overview of how to take progress photos using different cameras.
Option #1: Smartphone
Smartphones are the most convenient option for taking progress photos, as they’re always with you and are easy to use. Here are some tips for taking high-quality progress photos with your smartphone.
- Natural lighting is essential for taking high-quality photos, and smartphones work best in well-lit areas. Try to take photos during the day when there is plenty of natural light.
- Most smartphones have a range of settings that can help you take better photos, including HDR, portrait mode, and night mode. Experiment with different settings to find what works best for your project.
- To avoid blurry photos, make sure to hold your phone steady while taking photos. You can also use a tripod or other stabilizing device to keep your phone steady while taking photos.
Option #2: Drone
Drones are becoming increasingly popular for taking progress photos in construction, as they can capture aerial shots of the project. Here are some tips for using a drone to take progress photos.
- Before using a drone, learn the regulations in your area. Make sure to register your drone and follow any local laws or guidelines.
- Plan your shots in advance. Make sure to map out the area you want to capture and plan your flight accordingly.
- Like smartphones, drones often have a range of settings that can help you capture high-quality photos, including exposure, shutter speed, and ISO. Remember to try different settings to settle on the ones that work best for you.
Option #3: DSLR
DSLR cameras are also a popular choice for professional photographers and can be used to capture high-quality progress photos. Here are some tips for using a DSLR camera to take progress photos.
- The right lens can make a big difference in the quality of your photos. For progress photos, a wide-angle lens is usually the best choice.
- DSLR cameras allow you to control every aspect of your photos, including aperture, shutter speed, and ISO. For progress photos, it’s usually best to use manual settings to ensure that you get the best possible shots.
- To avoid blurry photos, use a tripod or other stabilizing device when using a DSLR camera. This will help keep your camera steady while you take photos.
Option #4: GoPro
GoPro cameras are extremely durable, making them a popular choice for taking progress photos in construction. Here are some tips for using a GoPro to take progress photos.
- GoPros can be mounted in a variety of ways, including on a helmet, chest harness, or selfie stick. Choose the mount that works best for your project.
- Like the other cameras, GoPros have a wide range of settings that can help you capture high-quality photos, including time-lapse, burst mode, and night mode. Experiment with a few to see what works best for you.
- To avoid blurry photos, make sure to hold your GoPro steady while taking photos. You can also use a stabilizing device to keep your camera steady while you take photos.
Check out the table below for a side-by-side comparison of the different camera types.
| Pros | Camera Type | Cons |
| Convenient and always with you Easy to use Affordable | Smartphone | Limited zoom capabilities Limited battery life Limited image quality compared to other cameras |
| Aerial shots Can cover large areas High-quality photos from unique angles | Drone | Can be expensive Limited battery life Can be affected by weather conditions |
| Wide range of settings for manual control High-quality images and editing tools Interchangeable lenses for different situations | DSLR | Can be bulky and heavy More expensive than other options Steep learning curve for beginners |
| Rugged and durable Wide range of settings for different situations Small and portable | GoPro | Limited zoom capabilities Limited battery life Limited image quality compared to other cameras |
How to take progress photos with Workyard
Workyard is a GPS time tracking and job scheduling app designed for field workers in the construction and field service industries.
It allows employees to track their time, location, and job details from their mobile devices while providing real-time labor cost intelligence to supervisors. For companies running payroll through ADP, Workyard also connects with the ADP time clock app, keeping tracked hours and documentation aligned across systems.
Taking progress photos with Workyard is a seamless process that can be done directly through the app. Adding photos to tasks and time cards is an integral part of the app’s functionality. Photos can also be centralized using Workyard’s reporting tools, keeping documentation connected to jobs, crews, and timelines.
From anywhere in the field, workers can add notes, photos, and receipts directly to time cards to show everyone back in the office exactly what work has been completed and what still needs to be done.
Regardless of the camera or app you use, it’s clear that taking progress photos is beneficial for construction professionals looking to document their work and track progress on job sites. For example, crews at TR3 Group use progress photos alongside time tracking to confirm completed scopes and keep office teams informed without constant phone calls.
In this article, we’ve covered a range of best practices for taking progress photos, and we’ve also discussed the many reasons why progress photos are so important in construction.
We’ve provided an overview of the best cameras and outlined the pros and cons of each camera type.
We’ve also explored Workyard, a GPS time tracking and job scheduling app designed for field workers in the construction and field service industries. Workyard makes it easy for construction professionals to take progress photos, track their time and location, and communicate with their team members and supervisors.
Sign up for a free trial of Workyard today and see for yourself how easy it can be to take progress photos in construction.
References
- 1
Adorama. “15 Drone Photography Tips.” Accessed May 10th, 2023.
- 2
Aphex. “Everything You Need to Know About Milestones In Construction.” Accessed May 10th, 2023.
- 3
Digital Camera World. “Best wide-angle lens in 2023: ultra-wide zooms that get everything in the picture.” Accessed May 10th, 2023.
- 4
Finding the Universe. “How To Use A DSLR Camera: A Beginner’s Photography Guide.” Accessed May 10th, 2023.
- 5
iPhoneLife. “How to Take Pictures with iPhone Camera App (2023).” Accessed May 10th, 2023.
- 6
Mark Brion. “The Importance Of Light In Photography.” Accessed May 10th, 2023.
- 7
Nomadasaurus. “7 Easy Tips for Taking EPIC GoPro Photos.” Accessed May 10th, 2023.